Hallo en welkom op mijn dag van de maandelijkse blog tour georganiseerd door Sewing By Ti! Het thema van deze maand is ‘Rood, Wit en Rose’. Iedere dag zal één blogger je een item laten zien wat zij speciaal voor deze tour maakte. De hele lijst van bloggers vind je dadelijk helemaal onderaan.
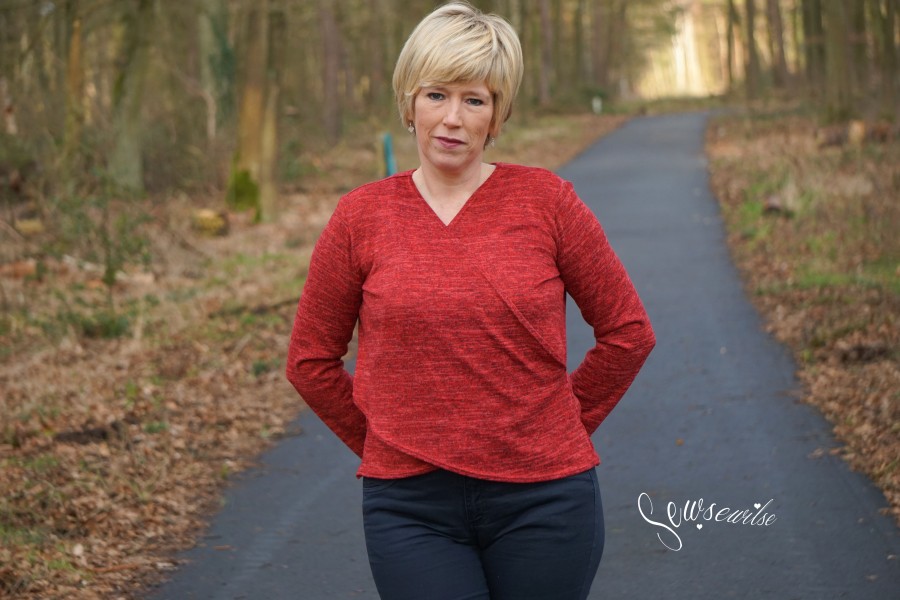
Ook ik wilde deze keer graag meedoen aan de blog tour en nog voor ik wist welk design ik zou maken, kocht ik tijdens de solden dit rood gebreid stofje. En toén viel mijn oog op de Michelle van D&G…
Hello and welcome to my day of the monthly blog tour organized by Sewing By Ti! The theme of this month is ‘Red, White and Pink‘. Every day, one blogger will show you an item that she made especially for this tour. You can find the entire list of bloggers at the very bottom.
I also wanted to participate this time in the blog tour and before I knew what design I would make, I bought this red hatchi during the sales. And then my eye fell on the Michelle of D & G …

Het maken van deze op heuplengte overslag sweater was een echte meevaller! Het patroon telt slechts 3 stukken! De overslag die je gespiegeld knipt, de achterkant aan de stofvouw en de mouwen. Ik moet je niet vertellen dat dit vlotjes ging.
Ik deed geen enkele aanpassing aan het patroon. De lengte van de sweater en mouwen waren prima voor mij. Wel gebruikte ik naadband aan de schoudernaden om deze te verstevigen. Je zou eventueel ook ‘Framilion’ kunnen gebruiken.
Making this hip length sweater was a real windfall! The pattern only counts 3 pieces! The wrap piece (cut mirrored), the back of the fabric (on fold) and the sleeves. I do not have to tell you this went smoothly.
I did not make any adjustments to the pattern. The length of the sweater and sleeves were fine for me. However, I used fusible tape on the shoulder seams to strengthen it. You could possibly also use ‘Framilion’.
‘Rechts over links’ zo moest de overslag zijn. Nadat ik de schoudernaden naaide en de mouwen erin zette, zorgde ik dat de neklijn en zoom met een tweelingnaald afgewerkt werd. Daarna deed ik het zo:
‘Right over left’, that’s the way the cross over had to be. After I sewed the shoulder seams and put the sleeves in, I sewed the neckline and hem with my twin needle. After that I did it like this:
1 Leg de sweater binnenste buiten voor je en sla de rechtse flap van de ‘cross over’ over je sweater. Speld de rechter zijnaad en linker zijnaad. Ik naaide deze vast met een naad op ongeveer 0,5 cm zodat het niet kon verschuiven.
Lay the sweater inside out for you and hit the right flap of the ‘cross over’ over your sweater. Pin the right side seam and left side seam. I basted it with a SA of 1/4″ so it could not slide.
2. Sla nu de linker flap van de ‘cross over’ over je sweater en speld/naai ook deze vast aan de zijnaad op dezelfde manier als hierboven.
Now lay the left flap of the ‘cross over’ over your sweater and pin / baste it to the side seam in the same way as above.
3. Als laatste stap moet je je mouwen nog sluiten en dan naai/zigzag je alles in één beweging van het begin van de mouw helemaal naar beneden naar je zoom. Klaar!
As a final step, you have to close your sleeves and then you sew/zigzag everything in one movement from the beginning of the sleeve all the way down to your hem. Ready!

D&G doet regelmatig promoties en ook deze keer kan je met de code ‘DGPATTERNS‘ bij het uitchecken in de shop een korting krijgen van 50%. De moeite dus!
D & G regularly promotes and this time you can also get a discount of 50% with the code ‘DGPATTERNS’ when checking out in the shop. That’s worth it!
Dank je om langs te komen!
Thanks for stopping by!
Ilse

Super mooi geweldige kleur voor je!
LikeGeliked door 1 persoon
Dank je wel en hoe leuk dat je weer iets liefs post! ❤
LikeGeliked door 1 persoon
Dank je wel!!
LikeGeliked door 1 persoon
Great tips! This is a great pattern you’ve made. Red is not my favorite color to wear so I like to see how others use it and it looks great on you. Thanks for the tips!
LikeGeliked door 1 persoon
Thank you and you’re welcome!
LikeGeliked door 1 persoon
Beatutiful Sweater. I have the Michelle on my list for fall.
LikeGeliked door 1 persoon
Thanks! Looking forward to see yours!
LikeLike
Love the color
LikeGeliked door 1 persoon